How to Create a Calculated Field on a Form in Microsoft Dynamics 365 for Sales CRM
How to Create a Calculated Field on a Form in Microsoft Dynamics 365 for Sales CRM
Personalize your fields
This week in Microsoft Dynamics Support, we’ll look at how to create a calculated field on a form in Microsoft Dynamics 365 for Sales CRM.
In this example, I’m going to add a field called “anniversary” to my accounts. This field will display the anniversary of our relationship with each company.
You can modify the instructions below to create other calculated fields in other entities.
See below for video and instructions:
Create a calculated field
1.) Go to Settings > Administration > Customization > Customize the System.
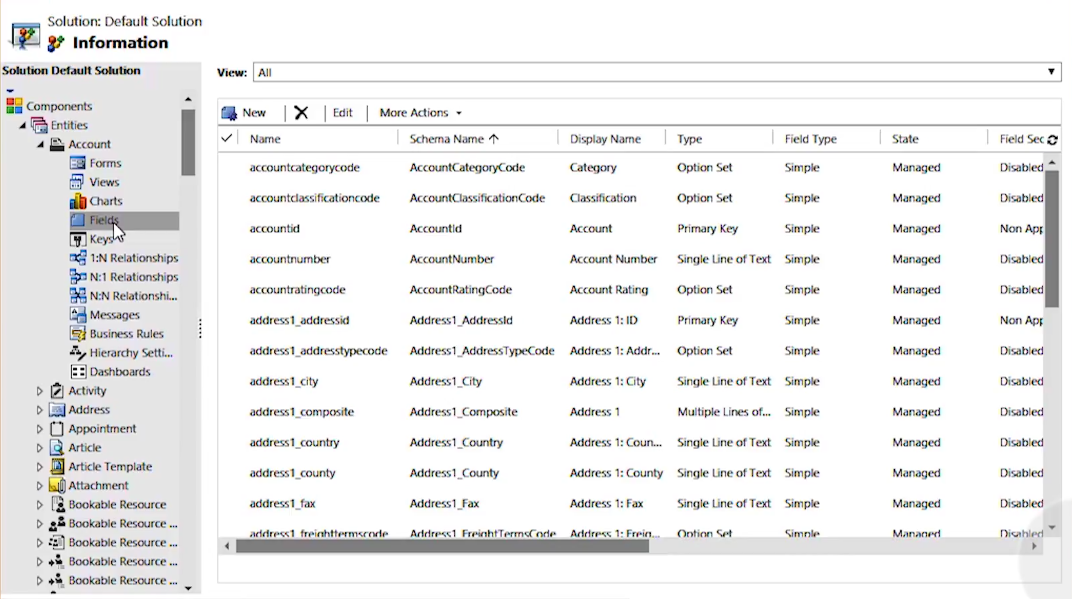
2.) Select Entities > Accounts > Fields, then click New to create a calculated field:
3.) Enter a Display Name and Data Type, then set the Field Type to Calculated:
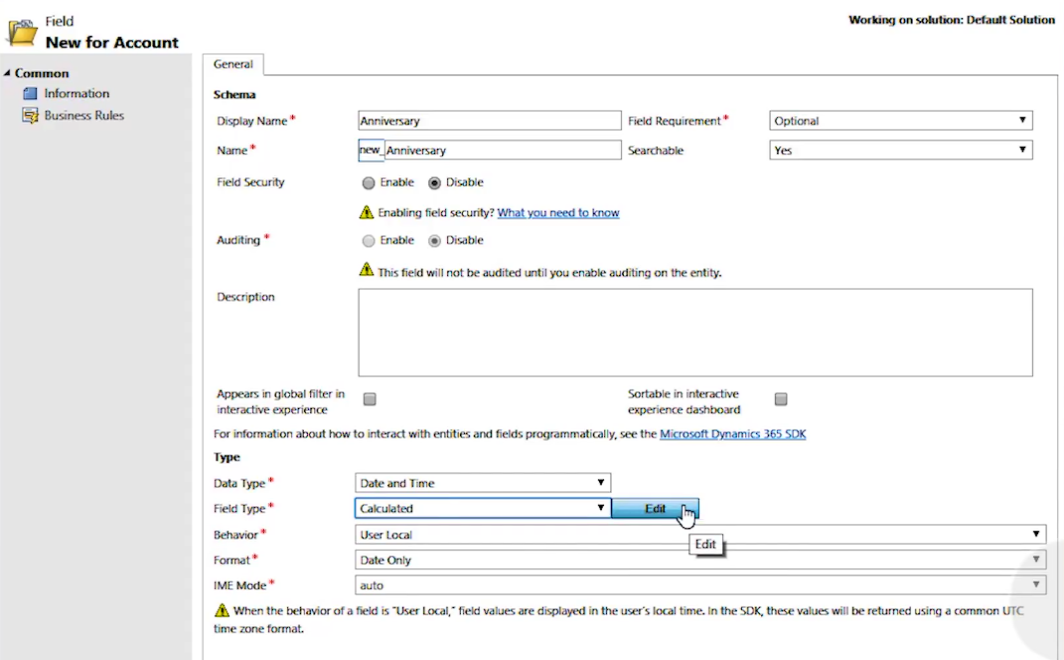
You can also enable field security, enable auditing, add a description, etc. But for this example, we’ll skip those extra steps.
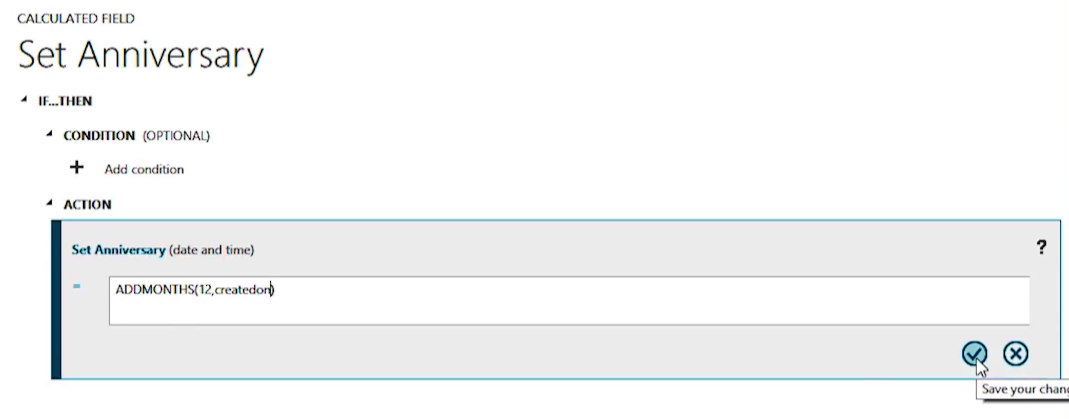
4.) Click Edit to set up the field function, then set the Action to ADDMONTHS(12,createdon)and click the  button:
5.) Click Save and Close.
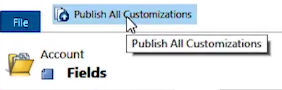
6.) Click Publish all Customizations:
Add a calculated field to a form
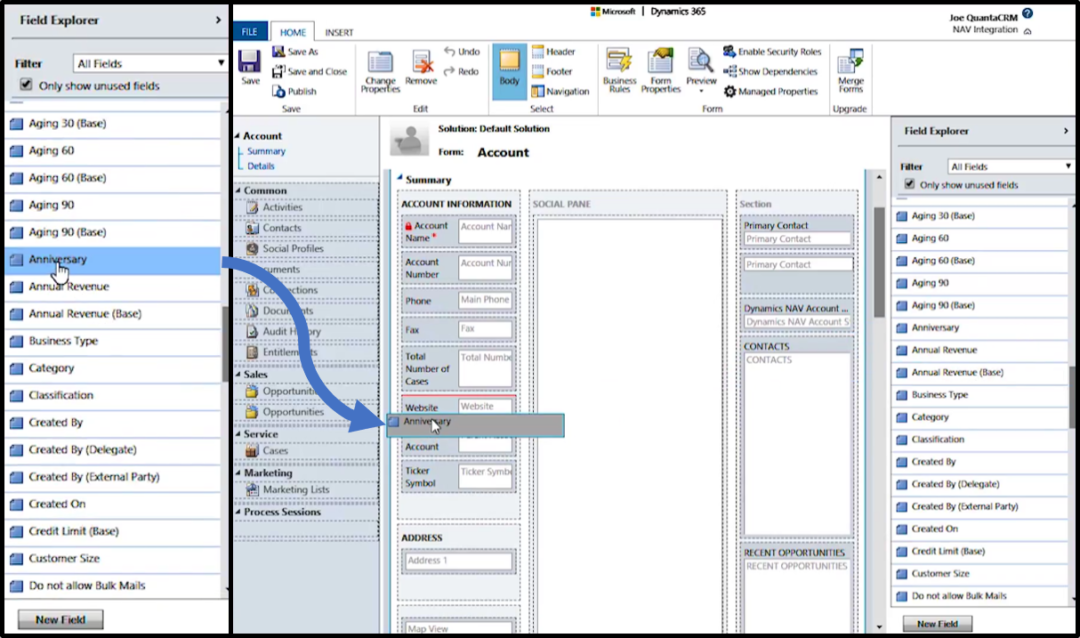
1.) Go to the record you want to add a calculated field to and click Form:

2.) Find the field you want to add in the Field Explorer, then drag and drop it into the formwhere you want it to appear:
3.) Click Save and then Publish, then close the form window.
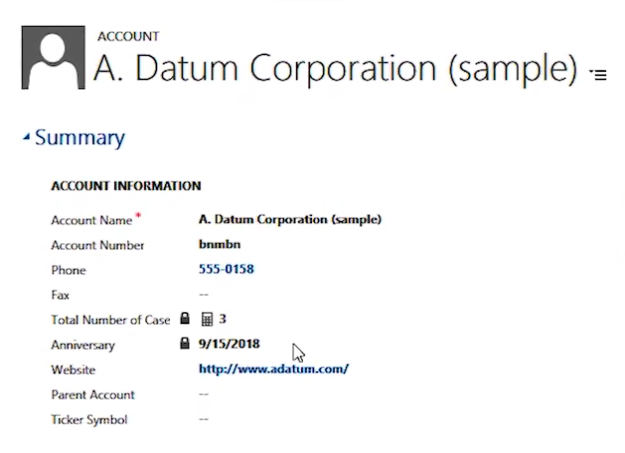
4.) Click F5 to refresh the record sceen.
You should now see your calculated field on the record:
Our OnTrack CRM Success System helps you get the most from your CRM investment with support services including:
- unlimited diagnostic support
- unlimited answers to “How do I …?” questions
- annual system audits
- regular progress calls from a dedicated account manager
- + additional valuable services!
We offer OnTrack in both month-to-month or annual subscriptions, and because we stand behind what we do, we offer a 100% money-back guarantee and you can cancel your plan at any time!
Azamba Spring Release Notes
Enjoy More Freedom and Flexibility with Your CRM Release Date: March 25th, 2026 - New updates are officially here, the CRM tools you know and love just got smarter. This Spring release focuses on giving you better visibility, easier task management, and a simpler...
Azamba Spring 2026 Add-On Update: Smart Tools That Keep Your Work and Team Connected in CRM
Chicago, IL – [March 25th, 2026] – Does your CRM still feel disconnected from the way you work? Are you left guessing what’s next instead of having clear visibility into pipeline, projects, and follow-ups? After 700+ implementations, we consistently see the same...
Azamba Q4 2025 Release Notes
Smarter, Faster, and Easier Than Ever – CRM That Just Works Release Date: October 29th, 2025 - Your favorite CRM tools just got a serious upgrade. This month’s updates to LaunchPad and the EZ Add-On Suite are focused on saving you time, reducing clicks, and making...
Azamba Q4 2025 Add-On Update: CRM That Works Harder, and Smarter, for You
Chicago, IL – [October 29th, 2025] – It’s here! The October 2025 update is live, and this one’s all about making your CRM easier, faster, and more intuitive than ever. From better automation and faster onboarding to smarter tools that just make sense, this update was...
Azamba Q2 2025 Release Notes
Release Date: July 16, 2025 - At Azamba, we believe your CRM should make work easier, not add unnecessary complexity. Every update in this release is designed to help your team save time, reduce admin, and get more value from Dynamics 365, so you can focus on what...
Azamba Q2 2025 Add-On Update: Everything You Need Now in One Place
Chicago, IL – [July 16th, 2025] – If you’ve ever wished Dynamics 365 could just work the way your team does, you’re not alone. This summer, we’re making it easier than ever to get the most out of your CRM with a single solution, a cleaner workspace, and smarter tools...
Azamba Launches EZ Notes: A Smarter, Simpler Way to Take and Manage Notes in Dynamics 365 CRM
Chicago, IL – [March 19th, 2025] - Are messy, disorganized notes wasting your team’s time and leaving critical details lost in the shuffle? Do you spend more time searching for information than acting on it? EZ Notes is here to end the frustration and take the chaos...
Powerful New Updates to Accelerate Sales for Microsoft Dynamics 365 CRM Users
Chicago, IL – [March 5th, 2025] – Azamba is excited to announce the release of EZ Buttons 3.1. This powerful CRM Add-On for Microsoft Dynamics 365 simplifies tasks and makes CRM a breeze to use. With this CRM Add-On, you will work faster and smarter with less...
Azamba releases EZ Buttons 3.0!
Chicago, IL – [November 20th] - We are thrilled to bring you EZ Buttons 3.0, a game-changing update packed with powerful tools to streamline your sales process and help you get more done, faster. With EZ Buttons, turn time-consuming, multi-step tasks into quick,...
Microsoft Dynamics 365 Business Central + CRM Integration Demo | Dynamics Deep Dive Series
Stay Connected Without Switching Systems If your team is jumping between tools just to get a full picture of a customer or transaction, you’re losing time. You might even be missing opportunities. The integration between Microsoft Dynamics 365 and Business Central...

Dinesh Joseph is a Microsoft Dynamics and Sage CRM technical consultant at Azamba. He trains, supports, and consults for both new and experienced Dynamics 365 and Sage CRM users. He also provides analysis and customization for both systems and their integrations.
His goal is to help his customers run their CRM systems smoothly and efficiently.
Related articles:


Azamba Spring Release Notes
Enjoy More Freedom and Flexibility with Your CRM Release Date: March 25th, 2026 - New updates are officially here, the CRM tools you know and love just got smarter. This Spring release focuses on giving you better visibility, easier task management, and a simpler...
Azamba Spring 2026 Add-On Update: Smart Tools That Keep Your Work and Team Connected in CRM
Chicago, IL – [March 25th, 2026] – Does your CRM still feel disconnected from the way you work? Are you left guessing what’s next instead of having clear visibility into pipeline, projects, and follow-ups? After 700+ implementations, we consistently see the same...

Azamba Q4 2025 Release Notes
Smarter, Faster, and Easier Than Ever – CRM That Just Works Release Date: October 29th, 2025 - Your favorite CRM tools just got a serious upgrade. This month’s updates to LaunchPad and the EZ Add-On Suite are focused on saving you time, reducing clicks, and making...